Home composting turns kitchen scraps and yard waste into a valuable soil amendment. This guide explains practical steps to start home composting, maintain a healthy pile, and avoid common problems.
Why Home Composting Matters
Home composting reduces household waste and improves garden soil. It lowers landfill contributions and returns nutrients to plants in a natural way.
Benefits of Home Composting
- Reduces food and yard waste sent to landfill.
- Improves soil structure and water retention.
- Supplies nutrients without chemical fertilizers.
- Cost effective and low tech.
How to Start Home Composting
Starting home composting is simple. Pick a system, gather materials, and follow a few basic maintenance steps.
Choose a System for Home Composting
Select a method that fits your space and lifestyle. Common options include:
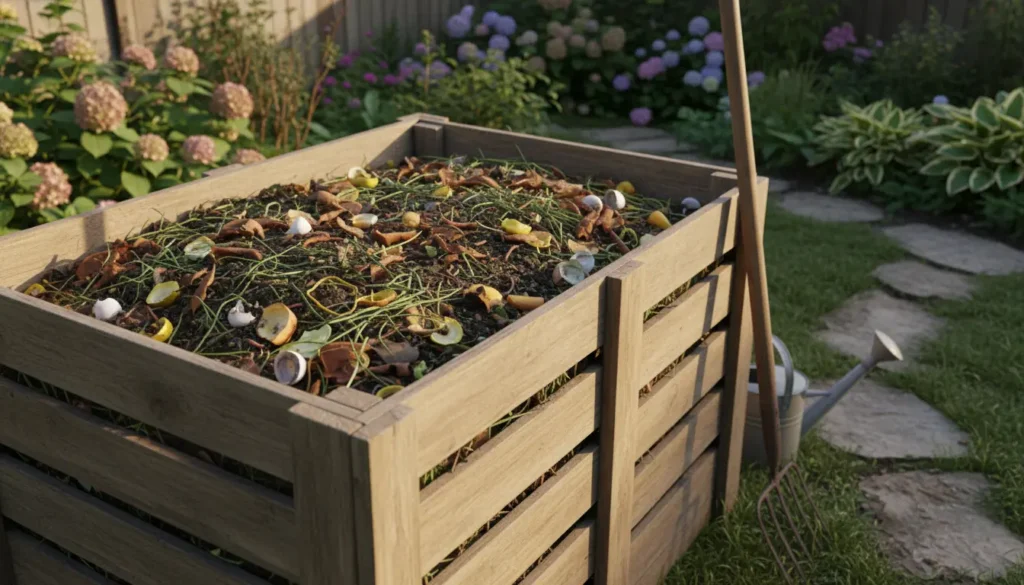
- Open pile: Works in larger yards and needs no container.
- Bin or tumbler: Neat, pest-resistant, and easier to turn.
- Worm composting (vermicompost): Ideal for small spaces and indoors.
Balance Greens and Browns in Home Composting
Compost needs a balance of nitrogen-rich ‘greens’ and carbon-rich ‘browns.’ A good rule is about 2 parts browns to 1 part greens by volume.
- Greens: vegetable scraps, coffee grounds, fresh grass clippings.
- Browns: dry leaves, shredded paper, straw, cardboard.
Step-by-Step: Start Your First Compost Pile
- Place your bin on bare soil for drainage and access to microbes.
- Add a 2–3 inch layer of coarse browns to start.
- Alternate layers of greens and browns, keeping materials chopped small.
- Keep the pile moist like a wrung-out sponge.
- Turn or aerate every 1–2 weeks to speed decomposition.
Maintaining Home Composting
Regular checks keep your compost active. Attention to moisture, aeration, and particle size helps decomposition proceed evenly.
Common Troubleshooting for Home Composting
If the pile smells or is too dry, adjust these variables:
- Bad odor: Add more browns and turn the pile to add air.
- Too dry: Add water a little at a time and mix.
- Slow decomposition: Chop materials finer and check temperature.
What Not to Put in Home Composting
Avoid these items to prevent pests and pathogens:
- Meat, dairy, oils, and bones.
- Diseased plants and invasive weeds with seeds.
- Pet feces and chemically treated wood.
Compost can heat to 130–150°F during active decomposition. Proper temperatures kill many weed seeds and pathogens when you maintain a balanced and turned pile.
Speeding Up Home Composting
To make finished compost faster, try these tips. They are practical and easy to apply.
- Shred or chop waste before adding it to the pile.
- Keep a consistent mix of greens and browns.
- Turn the pile regularly to maintain oxygen flow.
- Use a compost thermometer to monitor activity.
Small Real-World Example
Case Study: A two-person household started a 35-gallon tumbler. They collected kitchen scraps in a counter caddy, added shredded paper, and turned the tumbler weekly.
After four months they produced dark, crumbly compost and cut weekly trash by 40 percent. They used the compost on container tomatoes and noted healthier foliage and fewer waterings due to improved soil moisture.
Using Finished Compost
Finished compost is dark and earthy with no recognizable food bits. Use it to enrich potting mixes, top-dress lawns, or amend garden beds.
Application Tips
- Mix 1 part compost to 3 parts garden soil for planting beds.
- Spread a 1/2–1 inch layer as a mulch around plants.
- Blend compost into container mixes up to 20 percent by volume.
Final Checklist for Home Composting
- Choose the right system for space and effort.
- Keep a balance of greens and browns.
- Monitor moisture and aerate regularly.
- Avoid problem items like meat and pet waste.
- Use finished compost to improve soil and save money.
Home composting is a low-cost, practical way to reduce waste and support healthier plants. With the right setup and simple maintenance, beginners can produce quality compost within months and enjoy lasting benefits for their garden.