Home Composting Basics
Home composting turns kitchen and yard waste into nutrient-rich soil amendment. It reduces landfill waste and improves garden soil over time.
This guide gives practical steps for beginners to set up, manage, and troubleshoot a home compost pile or bin.
Why Choose Home Composting
Composting lowers household waste, cuts methane emissions from landfills, and creates free fertilizer. It also improves soil structure and water retention in gardens.
Even small efforts, like a countertop compost bucket combined with a backyard bin, make a measurable difference.
How to Start Home Composting
Starting composting requires choosing a method, collecting materials, and managing the pile. You can use a simple heap, tumblers, or a stationary bin.
Follow these basic steps:
- Choose a container or area with good drainage and some shade.
- Layer carbon materials (browns) and nitrogen materials (greens).
- Keep the pile moist like a wrung-out sponge and turn periodically.
Choosing a Composting Method
Select a method that fits your space and lifestyle. Popular options include backyard bins, tumblers, vermicomposting, and bokashi systems.
- Backyard bin: Low cost, good for yard waste and kitchen scraps.
- Tumbler: Faster mixing and easier turning; good for small yards.
- Vermicomposting: Uses worms; ideal for apartments and indoor use.
- Bokashi: Fermentation method for food scraps, including meat and dairy, before burial.
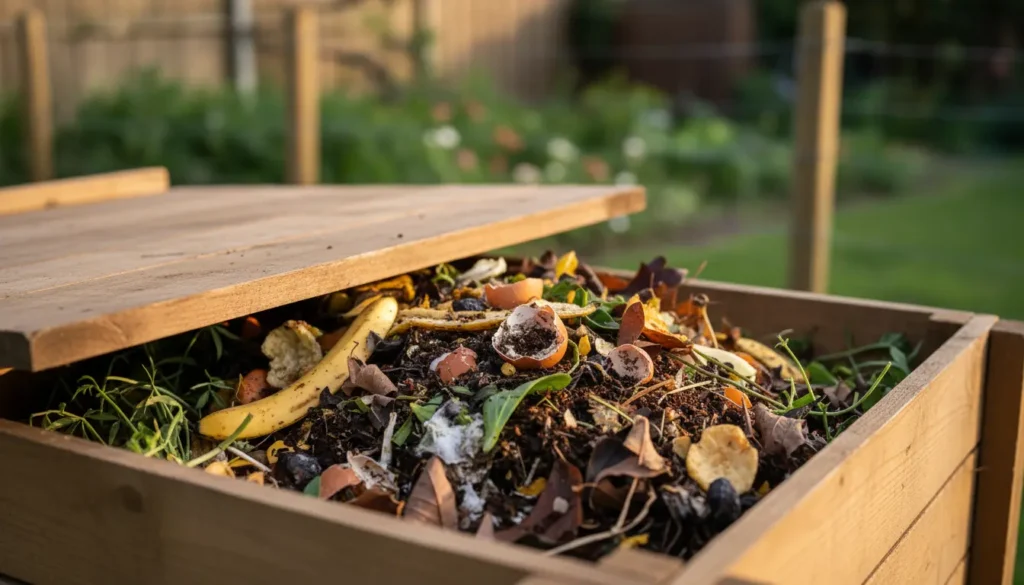
What to Compost
Successful home composting balances browns (carbon) and greens (nitrogen). Aim for roughly a 25–30:1 carbon-to-nitrogen ratio for steady decomposition.
Common Browns and Greens
- Greens: Vegetable scraps, fruit peels, coffee grounds, fresh grass clippings.
- Browns: Dry leaves, shredded paper, cardboard, straw, wood chips.
Avoid adding diseased plants, large bones, grease, or pet waste from carnivores. These items can attract pests or slow the process.
Managing Your Compost Pile
Maintenance is simple: monitor moisture, aerate, and add materials in layers. Turning mixes oxygen and speeds up decomposition.
- Moisture: Keep it like a wrung-out sponge; add water or dry material as needed.
- Aeration: Turn every 1–2 weeks for faster compost, or less often for low-maintenance piles.
- Size: A minimum of 3x3x3 feet is ideal for heat retention, but smaller systems work with proper care.
Troubleshooting Common Problems
If your compost smells foul, it is likely too wet or has too many greens. Add browns and turn the pile to introduce oxygen.
If decomposition is slow, chop materials into smaller pieces, add greens, or increase turning frequency.
Compost can reach temperatures of 130°F (54°C) during active breakdown, which helps kill weed seeds and pathogens when managed correctly.
Using Finished Compost
Compost is ready when it looks dark, crumbly, and smells earthy. Use it as a soil amendment, mulch, or in potting mixes.
Apply a 1–3 inch layer around plants, mix into planting beds, or blend with potting soil to improve structure and nutrients.
Case Study: Urban Apartment Composting
Sarah, an apartment resident, started vermicomposting in a 10-gallon bin on her balcony. She used red wiggler worms and collected kitchen scraps in a sealed countertop pail.
Within three months she produced enough castings to feed three medium houseplants and reduce weekly trash by two bags. Key success points were consistent feeding, avoiding citrus overload, and maintaining moisture.
Quick Tips for Beginner Home Composters
- Chop or shred larger materials to speed decomposition.
- Keep a small dry-brown stash (paper or leaves) to add when scraps are wet.
- Don’t add oily or salty foods that attract pests.
- Use a kitchen caddy with a lid and a charcoal filter to control odors.
Simple Composting Checklist
- Pick a bin or method that fits your space.
- Collect greens and browns separately.
- Layer materials and keep the pile moist.
- Turn regularly or manage worm activity for vermicompost.
- Harvest finished compost and apply to your garden.
Home composting is a low-cost, effective way to reduce waste and enrich soil. Start small, learn as you go, and adjust methods to fit your household.